Mac OS
Jump to:
How can we help?
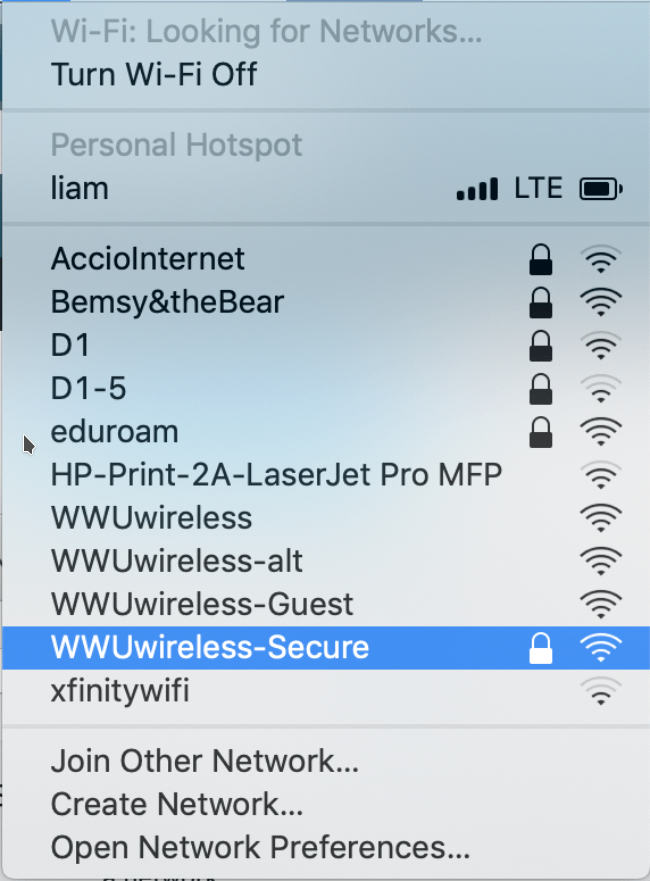
Connect to Wireless
- From the list of available Wi-Fi networks, select "WWUwireless-Secure".
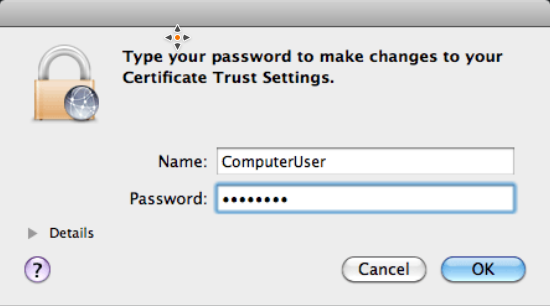
- To install the Certificate, select continue on the pop-up dialogue. Then, you will need to enter the password to your computer account (or an administrator of the machine). This is not your WWU account. It is the username and password to your computer.
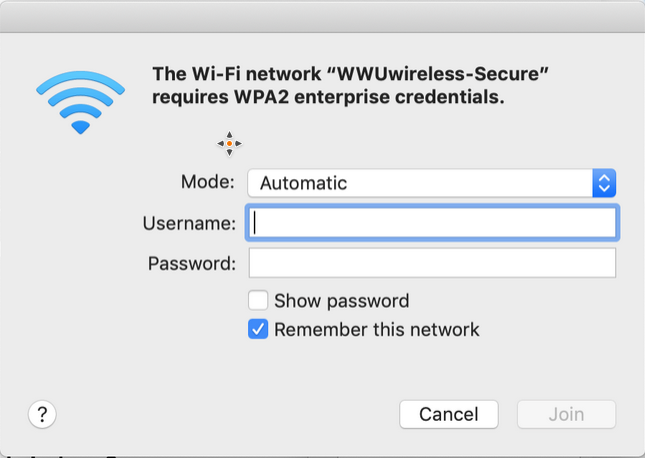
- You will be prompted a second time for a username and password after the certificate successfully installs. This is the authentication for the wireless network. You will need to use your Universal ID and password for WWU.
You are now connected to the "WWUwireless-Secure" network!
Troubleshooting
The following methods may aid in getting you connected if you run into any problems. If you haven't already, make sure to Forget the Network if you have previously connected to the "WWUwireless-Secure" network.
- When typing your Universal ID/Username, try typing your ID with the email handle (@wwu.edu), then connect to the network. If that didn't work, try it without the email handle.
- Configure your Mac's network settings to make sure it is set to automatically obtain an IP address from the network.
- Change/reset your Western account's universal password, then attempt to reconnect using your new password.
Configure Network Settings
- Go to Apple > System Preferences and click “Network” at the top.
- Check that the correct network adapter is selected (Most likely “Built-in Ethernet”) and click TCP/IP.
- Select the “Configure IPv4” drop-down menu and make sure that “Using DHCP” is selected.
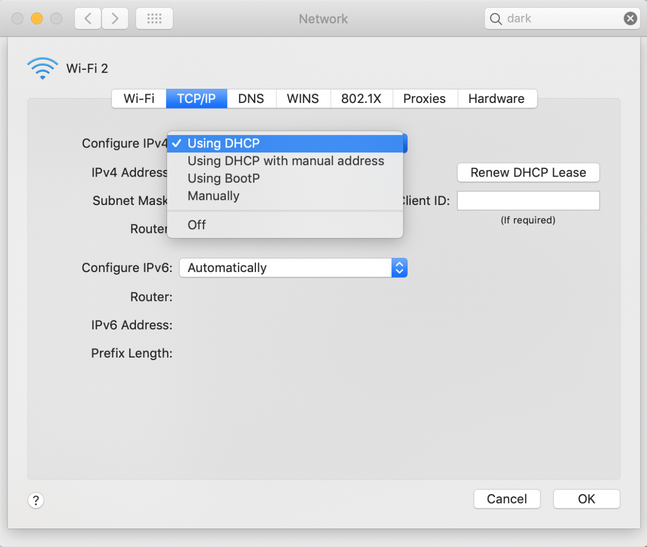
- If it was not, select it and click "Apply Now".
- Open a web browser to check your connection.