Chromebook
Jump to:
How can we help?
Connect to Wireless:
- Click the Wi-Fi button in the bottom corner of the screen.
- Choose "WWUwireless-Secure" from the list of available wireless networks.
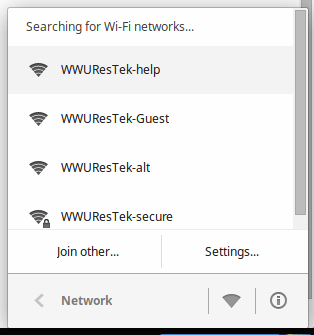
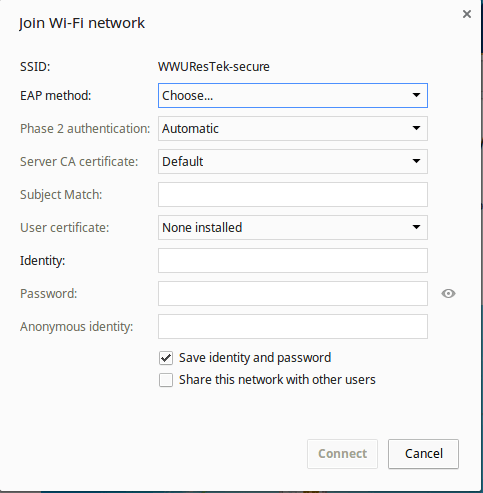
- You will see a form asking for:
EAP method
Phase 2 authentication
Server CA certificate
Subject Match
User certificate
Identity
Password
Anonymous Identity
- Use following details:
EAP Method: PEAP
Phase 2 Authentication: Automatic
Server CA Certificate: Do not check
Subject Match: Leave blank
User Certificate: None installed
Identity: Universal ID
Password: Universal Login Password
Anonymous Identity: Leave blank
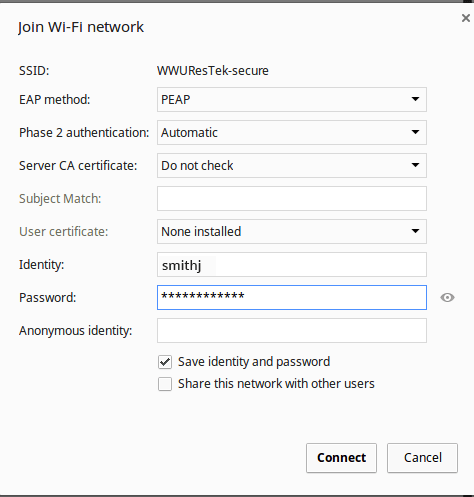
- Click connect and you will be connected!
Troubleshooting
The following methods may aid in getting you connected if you run into any problems. If you haven't already, make sure to Forget the Network if you have previously connected to the "WWUwireless-Secure" network.
- When typing your Universal ID/Username, try typing your ID with the email handle (@wwu.edu), then connect to the network. If that didn't work, try it without the email handle.
- Configure your Chromebook's network settings to make sure it is set to automatically obtain an IP address from the network.
- Change/reset your Western account's universal password, then attempt to reconnect using your new password.
Configure Network Settings
- Open Google Chrome.
- Click the Menu button. This button is indicated by three horizontal lines or three dots stacked on top of each other.
- Click Settings.
- Under Internet connection click twice on the network you want to set the IP address for.
- Click the Network tab.
- Check the Configure automatically checkbox.
- Click Close.