PlayStation
Jump to:
How can we help?
PlayStation 5
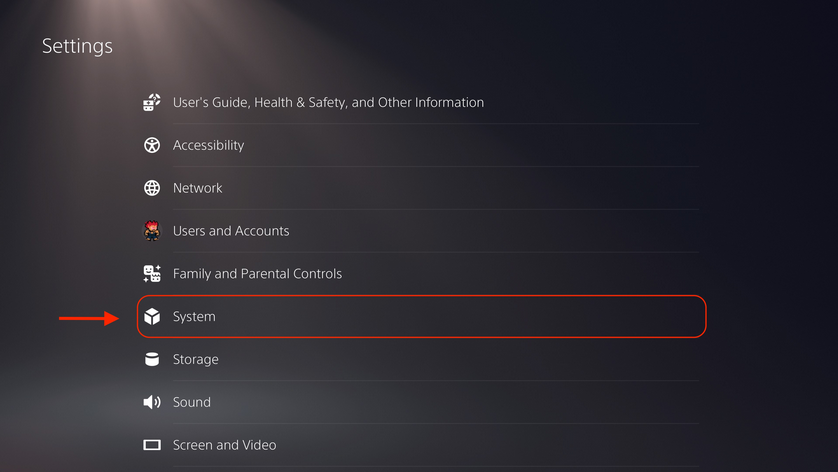
Step 1: Find your MAC address
- On the home screen, click on the settings icon (gear) in the top-right corner.

- Select System.
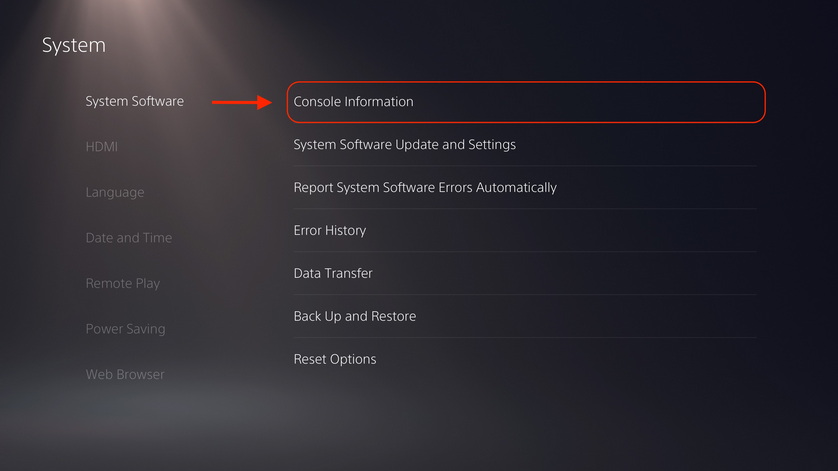
- Under System Software, select Console Information.
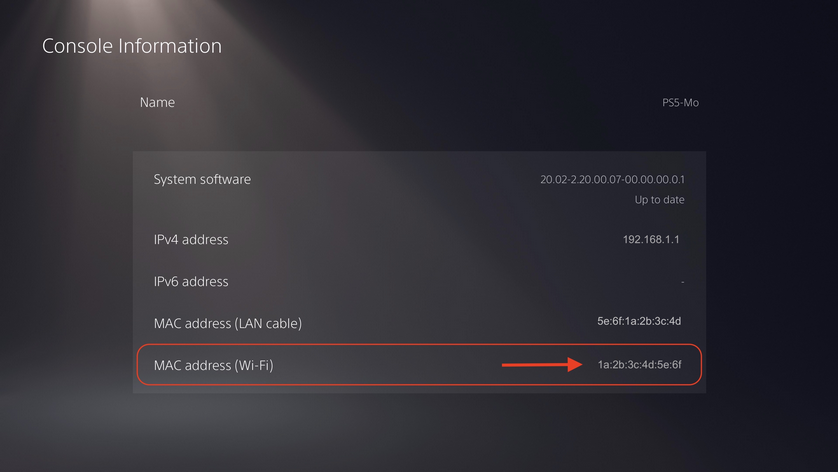
- You will see the MAC addresses for LAN cable (Ethernet) and Wi-Fi.
Referenced from boingo
Step 2: Register on Device Portal
After locating your MAC address, go to the portal and register your device with ResTek.
To Connect Wired
- Plug your device into the active Ethernet jack (orange) in your room (generally labeled ‘A’ or the left port).
- Ensure that your device is set to obtain IP settings automatically. This will vary by device but should be some variation of ‘Automatic’.
- Go to the “Settings” menu.
- Scroll down to “Network”.
- Select “LAN Cable”.
- Select “Easy”.
- Power your device off then back on again.
To Connect Wirelessly
- Go to the “Settings” menu.
- Scroll down to “Network”.
- Select “Set up Internet Connection”.
- Select “Use Wi-Fi”.
- Select "Easy".
- Select the network "WWUwireless-Guest".
- If it prompts you for a proxy server, select "Do Not Use".
- Power your device off then back on again.
Playstation 4
Step 1: Find your MAC address
- Power up the PlayStation 4 without any disc in the drive.
- Navigate to the “Settings” icon (located on the far left).
- Select "System".
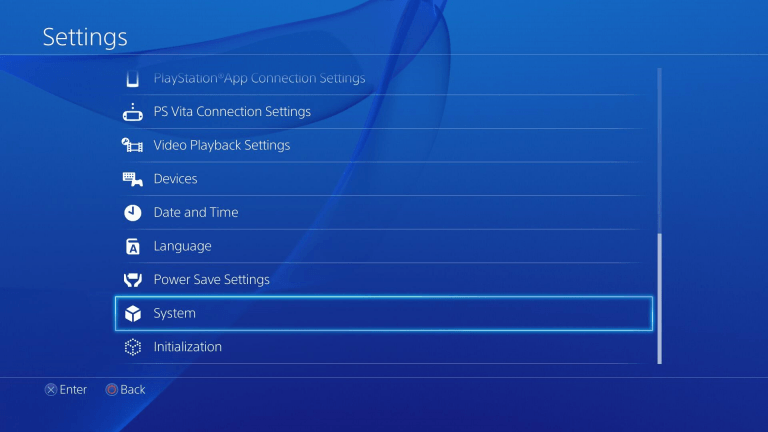
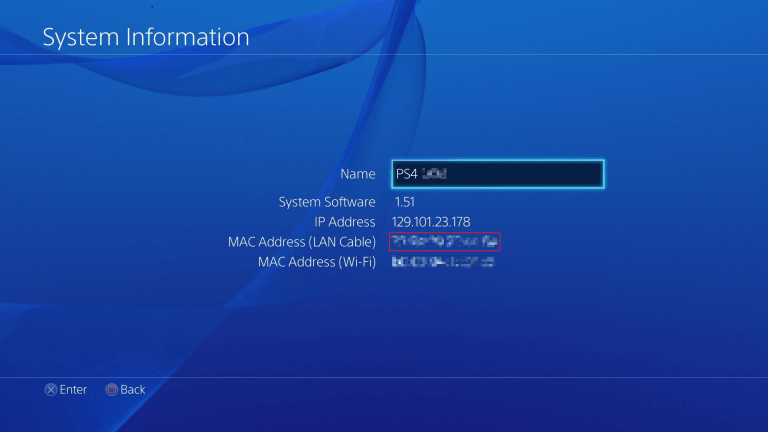
- Select "System Information".
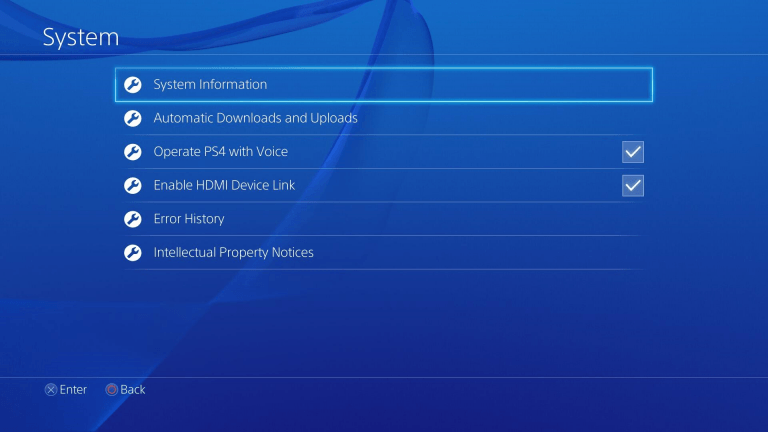
- If you are using an Ethernet cable, copy the LAN Cable MAC address. If connecting wirelessly, copy the Wi-Fi MAC address.
Step 2: Register on Device Portal
After locating your MAC address, go to the portal and register your device with ResTek.
To Connect Wired
- Plug your device into the active Ethernet jack (orange) in your room (generally labeled ‘A’ or the left port).
- Ensure that your device is set to obtain IP settings automatically. This will vary by device but should be some variation of ‘Automatic’.
- Go to the “Settings” menu.
- Scroll down to “Network”.
- Select “LAN Cable”.
- Select “Easy”.
- Power your device off then back on again.
To Connect Wirelessly
- Go to the "Settings" menu.
- Scroll down to “Network”.
- Select “Set up Internet Connection”.
- Select “Use Wi-Fi”.
- Select “Easy”.
- Select the network “WWUwireless-Guest”.
- If it prompts you for a proxy server select “Do Not Use”.
- Power your device off then back on again.
PlayStation 3
Step 1: Find your MAC Address
- Power up the PlayStation 3 without any disc in the drive.
- Once it has loaded, select "Settings".
- Once you are in "Settings" select "Network Settings".
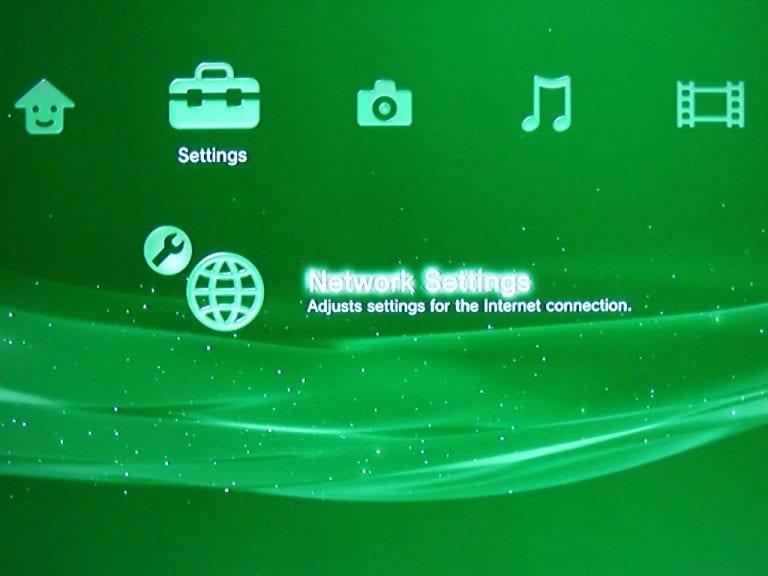
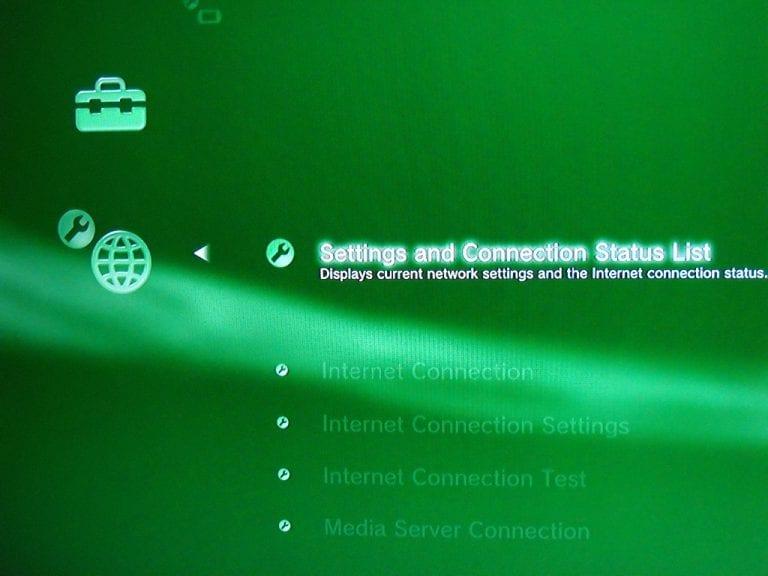
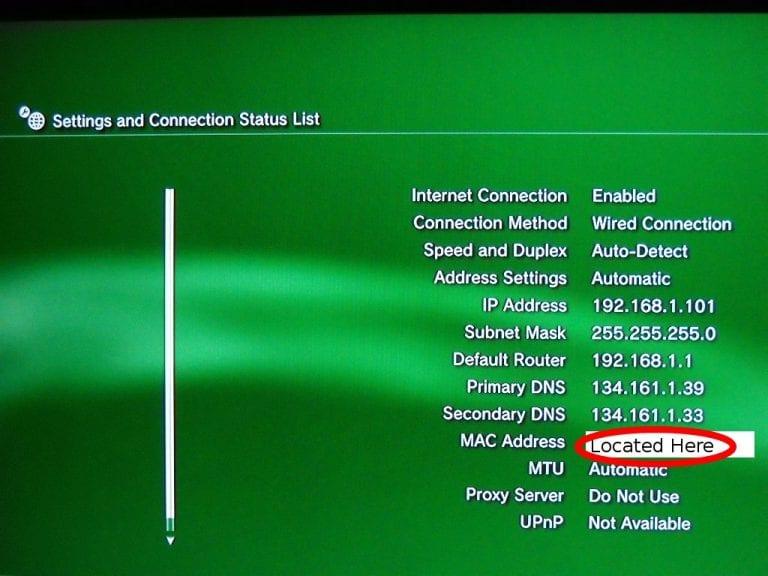
- When the "Network Settings" list appears, select the first option which is titled "Settings and Connection Status List".
- Find and copy the MAC address.
Step 2: Register on Device Portal
After locating your MAC address, go to the portal and register your device with ResTek.
To Connect Wired
- Plug your device into the active Ethernet jack (orange) in your room (generally labeled ‘A’ or the left port).
- Ensure that your device is set to obtain IP settings automatically. This will vary by device but should be some variation of ‘Automatic’.
- Power your device off then back on again.
To Connect Wirelessly
- Go to "Settings" > "Network Settings" > "Internet connection settings".
- Select "Easy" then "Wireless", then "Enter Manually".
- Set SSID: "WWUwireless-Guest".
- WLAN Security Setting: None.
- Set all Address and DNS settings to "Automatic" (if prompted).
- Choose all default options if not explicitly stated here.
- Press (X) to save settings.
- Power your device off, then back on again.
Troubleshooting
The following methods may aid in getting you connected if you run into any connectivity problems.
- Forget/Clear the settings for the "WWUwireless-Guest" network, then reconnect your console.
- Forget/Clear the settings, then de-register and re-register your device on the portal.
- Navigate to Settings - System - Advanced - Reset Options - Network Settings to reset your network settings, then reconnect to "WWUwireless-Guest".
If you are having issues with the NAT Type of the network, we unfortunately are not able to assist you. This is due to the way the university's networks handle assigning IP Addresses to devices.