Switch
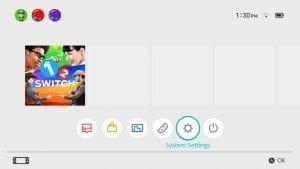
1. On the Nintendo Switch console, select “Settings” from the HOME Menu.
2. Select "Internet," and then "Internet Settings."
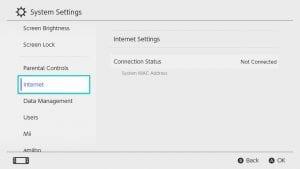
- On this page, find your Switch's MAC address, and register it.
- The Nintendo Switch will automatically search for near-by Wi-Fi signals.
3. Select the appropriate network name (SSID) from the list. In this case it's WWUwireless-guest.
- If you are unable to find your network's name, stand closer to the wireless router and press the Y button to search again.
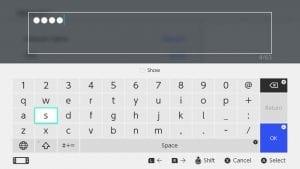
4. If prompted, use the onscreen keyboard to enter the network's wireless password, however WWUwireless-alt will not ask you for a password.
5. The Nintendo Switch will test the Internet connection. Once the test is complete, select "OK" to complete the process.
- If the connection test fails, an error code and message will appear, which can help you troubleshoot connection errors.
Wii
Note: Nintendo Wi-Fi connection service for Nintendo DS and Wii has ended, online gaming will not work, as well as streaming services such as Netflix. Wii U and 3DS are unaffected.
Step 1: Locate your Mac Address
Unless you will be connecting wirelessly, you first must purchase the Nintendo Wii LAN Adapter. The MAC address should be written on the side of the adapter. If the MAC address is not clearly visible, follow these instructions:
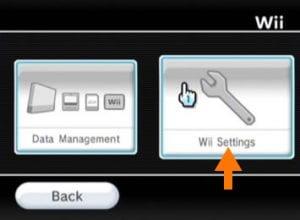
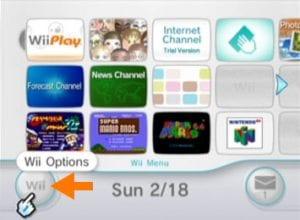
1. From the home screen, select the "Wii" button in the lower left hand corner.

2. From here, select "Wii Settings" which will be the on-screen button on the right.
3. On this screen, select the right arrow to advance to the 2nd set of settings.
4. Select the "Internet" option.
Select the "Console Information" option.
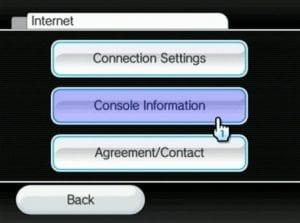
The MAC address for using our wireless connection will be listed under "MAC Address". (If using Ethernet select "LAN Adapter MAC Address".)
Step 2: Register Your Device on myResTek
After locating your MAC address, use this link to register your device with ResTek.
To Connect Wired
- Plug your device into the active ethernet jack (orange) in your room (generally labeled "A" or the left port)
- Ensure that your device is set to obtain IP settings automatically. This will vary by device but should be some variation of "Automatic".
To Connect Wireless
Once your device has been approved, you will have access to the hidden network WWUwireless-alt. This network must be manually added as it will not be visible in a scan. If prompted, Authentication Type is None or Open and Encryption is Disabled. All wireless enabled devices should be able to connect to this network once approved. If you are having trouble, remember that the network name is CaSe SeNsItIvE, and must be typed exactly as displayed above.
1. From the home screen, select the Wii button in lower left corner
2. Select Wii Settings

3. Use side arrow to get to the 2nd set of settings
4. Select Internet -> Connection Settings
5. Select an unused or free Connection slot (1-3)
6. Select Wireless Connection
7. Select Search for an Access Point
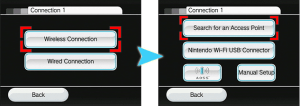
8. Select OK
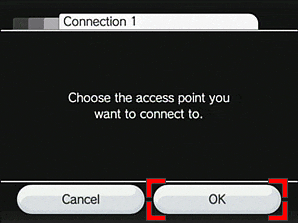
9. Choose WWUwireless-alt
10. Select OK and Initiate Connection Test
11. Select Use this connection
Wii U
Step 1: Locate Your Mac Address
Unless you will be connecting wirelessly, you first must purchase the Nintendo Wii U LAN Adapter. The MAC address should be written on the side of the adapter. If the MAC address is not clearly visible or if you are using the wireless connection, follow these instructions:
1. From the home screen, tap the wrench icon via the Wii U GamePad.
2. From here, select Internet, the first option on the far left.
3. On this screen, select View MAC Address.
Step 2: Register Your Device on myResTek
After locating your MAC address, use this link to register your device with ResTek.
To Connect Wired
1. From the home screen, tap the wrench icon via the Wii U GamePad.
2. From here, select Internet, the first option on the far left.
3. On this screen, select Connect to the Internet.
4. Press the Y button for Connection Types
5. Select Wired Connection
6. Select OK
7. The console will automatically perform a connection test
8. Select OK
9. Select Set as default connection
To Connect Wireless
Once your device has been approved, you will have access to the hidden network WWUwireless-alt. This network must manually added as it will not be visible in a scan. If prompted, Authentication Type is None or Open and Encryption is Disabled. All wireless enabled devices should be able to connect to this network once approved. If you are having trouble, remember that the network name is CaSe SeNsItIvE, and must be typed exactly as displayed above.
1. From the home screen, tap the wrench icon via the Wii U GamePad.
2. From here, select Internet, the first option on the far left.
3. Choose WWUwireless-alt
4. The console will automatically perform a connection test
5. Select OK
6. Select Set as default connection